Free blog ping Ping your blog www.hypersmash.com New One Fashion 2012: Instructionals
Showing posts with label Instructionals. Show all posts

Wednesday, March 14, 2012

WARDROBE REHAB: THE SPRING EDIT

Spring is officially here - and although in some parts of the world it may feel like it's been around for a while, and in others it seems as though it might never come at all, the change of season is a great opportunity to overhaul your closet. To reorganise, ditch the rubbish and generally renew your racks so you're ready for the new season and summer (!).

Spring is a great opportunity to embark on a a full on wardrobe edit, and hopefully you're acquainted with my Six Step 'Wardrobe Rehab' process. If you haven't fully reviewed your wardrobe in a while no doubt you will be in need of some serious organisation - so head over and get amongst my six steps - I promise you it will help.

Bearing in mind the change of season, in addition to the wardrobe rehab posts, here are a few extra tips to help welcome spring into your wardrobe.

Pack It Away - Make room in your closet for your spring clothes by packing away all your winter clothes - that includes coats, 400 knotted pairs of tights, warm boots and whatever you won't wear. This might go without saying but sometimes I forget to do this and find myself wading through winter bit and pieces for months.
Try Summer/Spring Clothes on - Make sure you try on all your summer gear to make sure it fits and looks great, this is great time to do a mini cull if you're not going to do the full on wardrobe rehab.
Review Colours - Need to stock up on a few coloured pieces for the coming summer? Now is the time to check if your wardrobe needs a few pops of colour.
Clean spring/summer accessories - Pull out items like your gladiator flats, hats and other things you probably haven't worn for 6 months and give them a good polish/spruce up so they're ready to go when you're running out the door. 
Check Basics - Do you have all the singlets and tees you're going to need for summer? Stock up on simple basics which will probably be the basis for your wardrobe in summer.
Organise - Fold, hang, completely rejig - now's the time! Ideas on how to do it here.
Make a Summer List - Look carefully at your wardrobe once it's nice and organised and see if there is anything you need to create better spring/summer simple outfits. Shorts? Mini skirts? Summer dresses? This is a great opportunity to create a list that will focus your shopping for the coming months. You will likely be able to find some of the things you need in thrift stores (where you'll find me most weekends) so make sure you check out there first.

Looking for inspiration for your Spring/Summer wardrobe? To help you I've picked a few favourite blogger and streetstyle outfits that felt very much appropriate. Pastels, florals, white and pops of colour - these will come as no surprise to you! Must remember to get myself a fedora in every colour asap!


springedit7
Jess from Tuula Vintage | Liz from Late Afternoon

springedit6
Mandy from Oracle Fox | Shea Via Cheyenne Meets Chanel

springedit5

springedit4

springedit2
Kendie from Kendie Everyday | Andy from Style Scrapbook

springedit3

Would love to know if you have any other spring wardrobe edit tips!

Monday, January 30, 2012

HOW TO WEAR BLACK AND WHITE

In the past I always struggled to wear black and white without feeling like a waitress. Not that there's anything wrong with being a waitress - in fact my aversion is a side effect of having worked (or rather tried my hardest to do as little as possible) in hospitality while I was at university - with the dress code virtually always being black and white. My memories mostly revolve around being covered in spilt coffee and dropping things the whole time (was a rubbish waitress!).   But funnily enough in the last year or so basic black and white has become a staple in my wardrobe - it's always such an easy combo. Taking inspiration from some amazing streetstyle - here are some ideas about how to wear it.

Textures - When in doubt I always go for textured fabrics like knits or leather to dress up the outfit.
Proportions - Play with proportions by mixing in mega wide leg trousers or a maxi skirt.
Accessories - Go bright and big with hats, belts, handbags, big collar necklaces or sky high heels (but um, not all at once). A black and white ensemble is the perfect base from which to work bold accessories.
Bright lips - Bright red lippy paired with a black and white ensemble never fails to ground you in french chic territory (rather than waiter territory).
Top to tail - Most people will wear black on the bottom and white on the top - but why not go the opposite?
Classic white shirt - Although the white shirt can be the biggest culprit when it comes to making you look like you work in hospitality - who can go past a classic white silk shirt? And works so well paired with high-waisted trousers. I guess even if you do wind up looking like a waitress, at least you'll look like great.
Mix it up - If you're really struggling, pair black and white with dark denim or grey marl.

blackandwhite
blackandwhite4
blackandwhite3
blackandwhite2
blackandwhite5


Follow via Bloglovin | Facebook | Twitter

Tuesday, January 17, 2012

HOW TO USE YOUR WEEKLY DIARY PLANNER

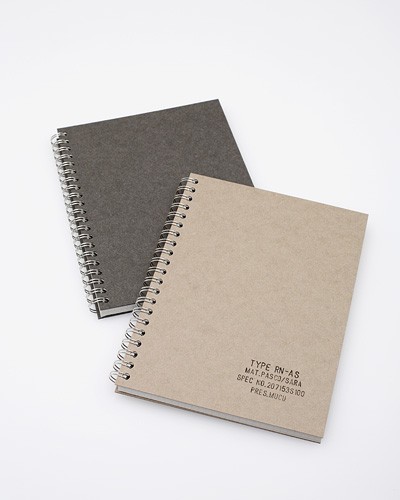
As they always say - preparation is key. I know lots of people shy away from planners or weekly diaries and many have taken their whole lives online (my boyfriend recently told me it’s time to get in 'the cloud’) but sometimes there's something satisfying about writing things down. And can I be honest and say I don't really trust 'the cloud' that much? Like, erm, what is it? So this year – why not go lo-fi (how hipster!) and get yourself a diary/planner in which to write your goals, appointments, to do lists, random thoughts and anything else that strikes you. I'm in no way an expert on this but I'm a crazy list maker - to the point of being ridiculous sometimes - and I'm pretty sure its been useful in keeping me on track in the past. I like the type of diaries that have a whole week across two pages (this is what I currently use) - you could always go for a day-to-a-page diary if you like but they are obviously more bulky. And don't worry, even though it's mid way through January - better late than never right?

Get started using it:
1. First things first – mark out your public holidays or other sorts of holidays (uni, school etc).
2. Mark in your friends and family birthdays – you can find these in the events section of Facebook if your friends are on it. Get on the phone and ask for dates if needbe.
3. Mark in your diary any weekly or monthly appointments you have (ie weekly deadline for my Harper’s BAZAAR post, tennis lessons etc). I usually only do this one or two months in advance as you never know what can change. 
4. Add in any new years resolutions – putting in specific goals in relation to savings, health, fitness etc.
5. Use your weekly diary as a place to write your appointments, to do lists and others. If you get a chance you can sit down on a Sunday/Monday and plan the week out in advance - exercise, catch ups with friends, emails and any major tasks you need to complete.
6. If you're a blogger you can use your diary to keep track of what you want to post and any other things you need to do.

Here are some little diary ideas!

I hope some of these ideas help you plan out 2012. May it be a very good year for all of you! 
Do you have any other tips or insights as to how you use your diary? 

Friday, December 30, 2011

4 STEPS TO MAKE & KEEP YOUR NEW YEARS RESOLUTIONS


Around New Years Eve I always start thinking about my new years resolutions. But how do you make effective resolutions that you can actually keep and aren't just a product of the Christmas excesses (lose weight, drink less, eat better etc). 

I thought I would share with you a little NY Resolution process that might help you plan and stick to your goals. I have to be honest and say that this is something my mum developed a long time ago (she is possibly the most driven person I've ever met) and forced us to do from an early age. Not appreciated at age 13 but as I have grown older it's definitely come in handy. I'm by no means an expert in this field but hopefully you find this (even a little bit) useful.
 
This process focuses on developing goals for the coming year that address all parts of our life rather than one or two areas, with major consideration of how you will realistically put your goals into action.


Step 1. Write goals for the coming year. 
You can use the following categories (a little cheesy but remember they are via my mother!):
TO LIVE (health, fitness, work, money, travel etc)
TO LOVE (family, friends, partner etc)
TO LEARN (academic, business, hobbies etc)
TO LEAVE A LEGACY (community work, charity, environment etc)

Examples:
TO LIVE -
money: save $15k for the deposit for a house.
travel: go to three cities I haven't been to before
fitness: play a team sport
work: change jobs
(etc etc etc)

Your goals don't have to be major or life altering, just
things you want to achieve - no matter how small or big. You should feel free to have as many or as few as you want. If you have one major thing in your life that you want to work through, feel free to just have that as your single goal, although I usually like to have at least a goal under each category so you know you have a balanced approach. 

Step 2. List any barriers
For each of the goals write down any potential barriers or obstructions to making them happen, then think of a strategy for overcoming that barrier.

Example: Save $15k for the deposit for a house. BARRIER - spending too much money on shopping. STRATEGY - Automatically put away x% of wage into an account you cannot touch.

Step 3. Write an operational Plan for each goal
Write a 12 month OPERATIONAL PLAN for your goals with a number of action items. This may have you doing certain activities on a daily, weekly, monthly or quarterly basis. Individual goals may have one action item or many action items, depending on their complexity.

Example: Save $15k for the deposit for a house.
Operational Plan - Action items
- Automatically allocate 20% of earnings as savings each month.
- Allow one new purchase per month (DIY the rest!)
- Eat one meal out per weekend instead of 2. Invest in nice produce to cook at home.
- Etc etc etc

Step 4. Mark Your Yearly Planner
Buy yourself a functional diary, and go through the diary and mark key action items. I go for a Molskine weekly diary that shows the whole week over two pages, but you can use what ever you want.

Example: Save $15k for the deposit for a house. Diary note: 24th January, Feb, March - payday, transfer 20% of wage to savings account.

Finally, also add key check points to review how your progress has been going through the year. Example: 24th July - have I saved $7k? At this point you can review what your goals were, which lets you react to your progress and change your goals if you need to.
 

Here's how one goal may look once you have completed the 4 steps:

Goal: Get fitter and lose xkg.
Potential obstruction: Lack of time to exercise.
Action items:
- Organise one exercise session with friends on the weekend.
- Alter working hours slightly to allow for exercise in the morning. 
- Commit to a half marathon to force self to exercise.
- Integrate 30 mins of incidental exercise into daily routine
Key dates in year planner: weekly run, PT sessions, Singapore half marathon. 
 
I know we all like to do Bridget jones style resolutions - i.e. to become a yoga guru in a week (I am a culprit of this!)  but in reality these types of resolutions can leave you feeling deflated once they don't materialise. Looking realistically at what you can achieve and putting together a plan for how you will do it can be a lot more effective. And don't be phased if not everything works out the way you planned - if you achieve one or two of the major things you list you'll be doing well.

Good luck in 2012!!! I hope doing more DIY comes in at the top of your list. 
 
Oh Btw, feel like you need a detox? Make sure you check out my HOW TO DETOX post.

Thursday, December 1, 2011

HOW TO DRESS FOR WINTER

Dressing for winter can be a challenge. Everyone wants to look chic but sadly keeping warm often means dressing like a crazy bag lady eskimo. But it really needn't be this way. Living in London taught me that winter dressing comes down to simple wardrobe maths - with outfits of high quality basics put together using winter wardrobe formulas. Layering is key so your outfits are usually going go like this - 'this plus that plus this plus that equals chic and warm'. Done badly this is where you can end up looking like you fell  into your wardrobe drunk and staggered out with whatever fell on top of you. But a bit of smart shopping and wardrobe planning will help eliminate this.  The image below shows a perfect basic winter wardrobe - nothing too fancy, just important staples to see you through the cold months. Read on for my simple winter outfit formulas to keep you warm day and night.


Day:
Blue Jeans +  Camel Knit + Black Boots + Fedora Hat + Grey Gloves

Denim Shorts + Leather Jacket + Tights + Boots + Red scarf

Jeans + Navy Pea Coat + Breton Top + Leopard Loafers + Beanie + Mittens

Leather Shorts + Grey Knit + Black Tights + Camel Boots + Beanie

Denim Shorts + Khaki Jacket + Camel Knit +  Tights + Black Boots


Night:
Leather Skirt + Camel Coat +White Silk Shirt + Tights + Black Heels +  Red Scarf

Bodycon Wool Dress + Camel Coat + Thigh High Boots + Tights + Leopard Gloves

Camel Skirt + Navy Pea Coat + Tights + Grey Knit (tucked) + Black Heels + Red Scarf 

Leather Skirt + Grey Knit + Camel Coat + Thigh High Boots + Grey Gloves


See? It's simply a matter of having a collection of the right staples and your options are endless. I know more than anyone that it's often not possible to buy them all at once, but get an idea of what you are missing and try to buy those things over time instead of other less important purchases. When buying choose colours that complement each other.

When getting dressed a trick  is to choose the base of my outfit first. Make the decision between jeans, skirt/shorts and tights or dress and tights as the base, and then plan the rest around it. Simple! Oh, and never underestimate the power of a pair of sheer spotted tights.

Do you have any other tips for winter dressing? I'm sure readers in really cold places like Northern Europe and Northern America might have some important insights! Here's a few inspiration pics of two of my favourite winter dressers - Alexa and Rosie.

Edit: In response to comments from people about needing extra warmth for their climates, here are a few extra tips:
- Layer two pairs of tights, one wool and one opaque.
- Wear thermals such as Uniqlo heat tech tees and leggings under long sleeved tops.
- Stay cosy with a knit layered with a wool jacket.
- Layer tights under jeans.
- Add wool socks over tights and then wack your thigh high leather boots on.
- Invest in a really good quality wool jacket made of thick felt-like material.


Wednesday, September 28, 2011

NINE PERFECT ANKLE BOOTS

This is for those of you who've emailed/commented wanting to know where you can get a pair of the  black ankle boots I always wear. You can see which boots I'm referring to here, here and here. Purchased from Mango two years ago, they're pretty damn perfect - black suede, a V shaped dip at the front, low heel and pull on leather tabs. A definite wardrobe essential that go perfectly with  just about everything I own. Sadly my pair aren't available anymore but I've compiled my top 9 ankle boots below so you can get amongst it.


1. Isabel Marant - Dicker Bottines - the original and the best.
4. Dolce Vita - Jamison Boot - I heart these (also available at OAK).
7. Ash - Jess Biss Curved Zip - these are perfection.
8. Topshop - acne pistol lookalikes!

A tip if you're not  overly confident with your pins - invest in ankle boots with a dip at the front (like the Ash ones above) for their leg lengthening and ankle shrinking properties. It. Works.

Tuesday, August 30, 2011

LEOPARD PRINT DIYs

Even after a few seasons I still have a hankering for a little bit of leopard print.The DIY sort of course. It's interesting that this 'power leopard' colour palette (see on me at LFW last year) - red, leather, leopard - is still going strong. I love when you get a little bit of time to enjoy a trend. Although lots of my friends would argue that their leopard print ballet flats are a staple that they'll never give up. Anyways, here's a round up of my favourite leopard inspired DIYs.

What say you guys, is leopard still on your agenda?

Images: Pinterest, Net-A-Porter, Le Blog De Betty

Follow via Bloglovin | Facebook | Twitter

Thursday, August 25, 2011

AUTUMN WARDROBE PLANNER


The last week of summer ladies and gents - I hope it's been a good one! You'll have noticed that the shops are full of autumn/winter gear, so what investments should you make to ensure you are AW11 ready? Fear not - you really don't have to go out and buy a whole new wardrobe. A couple of key pieces is all you need.

Hopefully you have a set of good quality basics (if you don't see this post, and this one also, to give you a helping hand in that department) to which you can add a couple of items for instant updates. What will I be investing in? I'm loving the snake/mustard/maroon/and monotone palette for the cooler months. And glitter encrusted shoes (cue my recent DIY), as well as collar necklaces and statement boots.

Make sure to duck into your local thrift stores and flea markets to see if they have anything in these colour palettes and styles. I'll be DIYing my most lusted after items and trends - so stay tuned for key autumn/winter looks that you can make yourself (camel cape or leather skirt anyone?).

Follow via Bloglovin | Facebook | Twitter

Thursday, August 11, 2011

DIY AUTUMN

Ok so I recognise that in some places in the world, the weather is starting to cool down a bit. I won't say 'the grass is always greener' or anything because its lame but I sort of miss the bittersweet Autumn days in temperate cities - when the leaves start to turn golden and you know that summer is on its way out. I know for some places its been a pretty horrible summer - the most sun my London friends have seen has been on their annual trip to Ibiza ('eye-beefa'), and for that I should be grateful for the long hot sunny days in Hong Kong (and clear skin as a result of sauna style temperatures and the resulting sweatiness! Oh and did I mention crazy frizzy hair?). In an effort to emulate this whole 'four seasons' thing I have picked some of my favourite Autumnal flavoured DIYs. These will come in handy for me in say, um, December - but then again the aircon is pretty cold in my office - maybe I can prance around indoors in a cape?


1.See by Chloe Tartan Cape
2. Isabel Marant Feather Necklace
3.Cobra Society Boots
4. Junya Wanatambe Plaid Shirt Dress

btdubs - how good are the Cobra Society boots????

Wednesday, August 10, 2011

HOW TO DIY - 5 STEPS

Finding time, the DIY toolkit and more. I often get emails from readers saying that they love DIY fashion projects but don't do any - common reasons for this include a lack of materials, inspiration, confidence and above all, time. Bearing that in mind, I've listed out below my 5 key steps to getting started on DIY fashion projects.

1. GATHER THE ESSENTIAL TOOLS
The first step is to organise a DIY essentials kit. This kit will have the key tools to support the actual process of your DIY projects, and without them it's going to be super hard to follow through when you're inspired.  There is a huge benefit in taking the time to collect the right basic tools at the start - it opens up your imagination and means less barriers to getting started on a project. To do this, get a box and start collecting. You can check out M&J Trimming, Ebay, Hardware Stores, Flea Markets and craft stores for these items . At a minimum your essentials toolkit could contain the following things:
  • a good pair of dressmaking scissors
  • a box of dressmakers pins
  • a measuring tape
  • chalk
  • black and white thread
  • needles
  • a quick unpick
If you have cash to splash, invest in:
  • a sewing machine (mine is a Singer model '2250 Tradition')
  • a glue gun
A sewing machine is the best investment you will ever make in terms of the quality and type of DIY projects you will be able to produce. But I know they aren't cheap (my aussie one was AUD$600 and the one I now have in HK went for US$250) and it's a huge investment to make when you don't know how to sew or if you will even like it. Why not buy one with a group of friends and take turns using it? The person who enjoys it the most can always buy the others out if interest wanes. Find a local sewing school or sewing cafe and do some classes before you invest - Sweatshop Cafe in Paris and The Make Lounge in Islington are two fun places to learn how to sew. If anyone knows of any other sewing classes/schools/cafes they would like to recommend please leave a comment below.

2. COLLECT INSPIRATION
Look around you for inspiration for DIY projects - in magazines, on blogs, style.com, on the streets, in shops, in your local department store. Start asking yourself, could I DIY that? Collect and keep images and ideas, have a folder on your laptop or computer titled 'DIYS to do' where you regularly save off inspiring images from blogs and websites, tear images out of magazines, and take pictures on the streets. DIY ideas can be fleeting we've all got a million other things to think about, so make sure to nail down your inspiration when you have it. This allows you to come back to it later on when you have time.

3. EXPERIMENT ON THRIFTED CLOTHES
The easiest DIYs involve altering and experimenting on thrifted clothes. This is really how I got started. Creating a garment from scratch is really a daunting task (for me too!), but making changes and alterations to existing clothes is a surprisingly easy place to start. Add fringing, studs, feathers and buttons as a start. Check out local charity shops, seconds stores, flea markets and garage sales for clothes that you can experiment on. The less you spend on these items, the more likely you are to be imaginative.

4. STOCKPILE DIY MATERIALS
Get together a collection of cheap materials - such as chains, buttons, studs, ribbons, and zips,  which can be used to DIY items of clothing or accessories. Often you will find these materials in the most unlikely of places - thrift stores, hardware stores, newsagents and stationary stores, plumbing shops and junk yards. All these stores have a million different items them that, with a little creativity, can help you produce professional looking DIY projects. I have a tendency to stockpile these items when I see them, even if I don't have a use for them at that particular moment - they always come in handy down the track. I also try not to spend too much on these things - DIY for me is a way to satisfy my fashion cravings without breaking the bank.

5. MAKE TIME
I get asked alot 'how do you find the time to do DIY?'. Time is one of the biggest factors in being able to carry out DIY projects, and what stands in most people's way. Most of us lead busy lives - between work, socialising and (occasionally haha) going to the gym, there is very little time left. My biggest tip is to commit time to doing projects, as that is one of the only ways they happen. I generally commit to doing one project over the weekend - Sunday afternoon is my favoured time to put on some Sex and the City and have a 'crafternoon'. You could commit to doing a project a month or fortnight and take the time to prepare for it. Still torn between other commitments? Organise to do some projects with friends so that you can kill two birds with one stone. Or do some DIY whilst on public transport - beading and other sewing projects are possible. I also always have a project to do while sitting in front of the TV, most of us waste a fair amount of time watching the new Weeds/Breaking Bad/Californication (etc) episodes - so make it productive DIY time.

And lastly... Don't be afraid to have a go. Have the confidence to make DIY inspiration reality, the worst thing that could happen is that it doesn't work out. Reduce fears associated with this by using cheap and thrifted materials. Every good DIYer has a project graveyard, a place for those DIYs that didn't work out as planned. I have ruined so many projects by getting scissor happy and cutting a dress/skirt too short. A word of advice - more is more when it comes to hems and scissors, trust me! Remember, projects that go awry can always be refashioned in the future, so there is no such thing as a complete fail.

Has this post answered some of your questions about how to DIY? Feel free to add any comments or further questions you have below - would love to know if anything else stands in your way from doing DIY projects. Share the love and DIY!

Thursday, July 28, 2011

DIY 6 Week Detox - The Basics

What better place to start when embarking on a mind-body-soul detox than with your health? I'm definitely no pro when it comes to nutrition and exercise (check out Joanna Hall or Miranda Kerr's Kora Organics blog if you want some better advice) but I have read enough to know what works for me. Don't for a second think I would embark on some ridiculous lemon water diet - let's face it, no one is fun to be around when they're hangry (hungry + angry = hangry). And what joy in life is there without good food? (surely I'm not the only person who structures their whole day around their next meal?).

Anyway, I did up a little collage of the health 'basics' for the six week detox. I guess the point of the basics is to just be consistently healthy - no crazy rules or regulations. To be honest - this is how you should live every week, and not just six weeks in a row. But baby steps, right?


Exercise - cos you know you have to. The four sessions I listed above are what work for me, but some people prefer more cardio or yoga or pole dancing or whatever. The point is to do 4 formal sessions of exercise per week. When I say 'pump' I mean anything that works your muscles and core - be it a class, TRX session, monkey bars, rock climbing etc. In addition, you want to maintain a certain level of activity on a daily basis - I like to walk everywhere I go so that's the easiest thing for me to commit to. Aiming to do 1km of walking as part of getting to work, 1km at lunch and 1km on the way home will have you almost there. May sound hard but its a conscious choice to make - leave early on the way to work and walk to the next tube stop, go up the stairs instead of the lift, get off your desk and do some errands at lunch.

Nutrition - Again, not rocket science. Pack your diet full of fruit and veges, lean meats and fish, and cut down on all the good stuff (booze, salt, sugar, fats). Swap your nightly starchy foods - like rice, noodles, pasta, bread, potatos etc, for beans, lentils and more vegies. This is a tip I picked up in one of Joanna Hall's books. I'm not usually the diet and lifestyle book type, but I found it in a North London jumble for a quid and it turned out to be the best pound I ever spent! I don't agree with the whole Atkins no carbs thing (Jessica Simpson looked wayyyyy hangry when she was on it) but limiting nightly intake makes sense. Luckily the bf is pretty handy in the kitchen and I got him onto making lentils, beans and veges as sides to fish or meat at night - and haven't looked back! If I get a chance I might post a few (of his) recipes here over the next 6 weeks.

For snacks, I'll be eating roasted unsalted nuts like almonds as well as fruit and crackers. Cutting down on alcohol is also a key element of the detox. I don't mean becoming teatotal, and it will all be relative to your current drinking levels, but having none during the week and only a few over the weekend seems to me to be a good approach (by ohhhhh so hard!).

I guess I failed to mention not to eat take away junk food, as in, ever. Its shit. I'll leave it at that. Although... one small cheeseburger may be allowed if you are incredibly hungover and stayed out until 4am the previous night. However if this is the case you probably already drank your weekly calorie intake in one night so a cheeseburger aint gonna kill you... (the detox sounds like its gone off the rails already!).

Hope you like and agree with my basics for the next 6 weeks, feel free to comment and add any of your insights! As a disclaimer, I'm definitely no pro in this area, but thought it might be nice to share some ideas. Sorry for the interruption to the usual fashion-related posts. Normal programming will resume shortly.

Wednesday, June 22, 2011

The Perfect Wardrobe Essentials

As most of us know, essential items are the backbone of a functional and gorgeous wardrobe. If you've been following me for a while you will have read about my Wardrobe Rehab Project - where I used 6 steps to (attempt to) perfect the contents of my closet. I found that with an arsenal of high quality and well fitting essentials, you should be able to mix and match a multitude of outfits that suit every occasion. Although I often reflect or DIY a trend when I like it – blindly following trends can lead to regrettable, never worn, purchases. (Cue Clueless soundbite – Dionne: ‘Dude what’s wrong, are you suffering from buyers remorse or something?’ Cher: ‘God no, nothing like that’). So for the last 6 months I have I put a ban on buying cheap disposable items (no H&M or crazy sale purchases for me) and got to work creating my ideal wardrobe, made up of perfect essentials. Although getting my essentials down pat was never going to happen over night (I'm not made of money), 6 months on I think I am doing pretty well. I decided to put this little collage together of my wardrobe essentials, most of which I have in my wardrobe by now.

Mixing and matching the styles in this collage is fun - so much outfit potential to take you from the office, to out on the town, to the beach and well, just about anywhere.

To refresh on the tips I posted in my Wardrobe Rehab Essentials post, the things that have helped me to develop my essentials are:
1. I have tried to stick to a neutral colour palette for essential items. When faced with a choice of buying coloured or neutral for a specific item, I chose the latter (black, navy, white, came, khaki) for longevity. I added a little bit of red for pop - I love wearing it so I think it's allowed to be in the 'essentials' category.
2. When in doubt, I go for a 'frenchy' aesthetic, as you can probably see. I love to buy out there items but in the area of essentials, French chic proves long lasting
3. I tried to buy the best quality I could afford (the Sofia Cuppola LV bag in the image is OBV a pipe dream), by rationing purchases of smaller items to save for larger essential items.
4. I mix in vintage or DIY styles for on trend items.
5. I actually found lots of my essentials - breton tops, camel skirts and dresses and some accessories - in thrift stores. I find sometimes that the quality of vintage clothes trumps new cheap styles.

Friday, June 17, 2011

DIY Stacked Arms - worthy of tommy ton

You may have seen my recent How To Guide on how to stack your wrists 'arm party' styles. But maybe you're not content with just stacking and want to take your arm adornments to a fashion week worthy level? Well read on for a few extra rules for the stackage - that should have you snapped outside Somerset House and spirited away onto Style.com before you can say peony lim!

Colours - Choose a base tone of gold or silver for your stack based on your watch or your taste - add bracelets, spikes and chains in this tone.
Go for Texture - In addition to the hardware, add a few friendship bands, bits of rope, string or fabric and leather bands in a complementary palette (neons yes please) for texture.
Distribution - Mix em up! Distribute the different elements discussed in my previous post randomly across your wrist - you want it to feel carefree and nonchalant.
Focal Point - aka the USP (unique snapping point). This item attached to chain or string, be it a charm, button, globe, tassel or whathaveyou, should focus and surprise an onlooker. It hopefully gets their trigger finger a-twitchin.
More is more - unless of course, if more is actually less. Once you've wristed your stack - take a long hard look. Does it feel fun and festival-ly or somehow overthought? Remove items if it looks like you spent too much time thinking about it.
Keep those hands busy - Heaven forbid your wrists should just be dangling there or swinging when you're walking. Carrying items helps promote a sense of 'too busy to care about stacking' attitude - which is good if your wrists look like a Christmas tree. What should you carry? Invitations to top tier runway shows score points, as do busy looking blackberries and 'it'-bucket-bags. For me, the more random the item the better - the person who manages to lug a watermelon down to the Tulleries along with fully stacked arms gets my vote and hopefully some space on Mr Ton's memory card!

 Here's an example of a fun (and maybe even snap worthy?) armload.
How cute are the tiny geisha key charms? String them on some twine and away you go!

Need more arm party inspiration? Leandra of the Man Repeller posted here with a whole heap of instagram pics of her wristwear, Honestly Wtf is the place to go for DIY bracelet tutorials (I still have dreams about the hex nut bracelet) and Blair over at Atlantic Pacific always has prefectly stacked wrists. Happy stacking!

Tuesday, May 31, 2011

How To Pack For A Holiday

Recently I've been posting little snaps of the contents of my suitcase whenever I have gone away for a trip, and have got quite a few emails from people asking me if I could share my packing tips. There is nothing worse than arriving at your destination only to realize you don’t have the right clothes, or worse still, your clothes don’t go well together. Having lived in London and travelling with budget airlines like Easyjet, you become quite good at packing lightly so as not to get stung by the massive checked in baggage fees.  You basically want to create a small yet versatile capsule wardrobe that will fit in your carry on. Sounds impossible you say? Not in the slightest.
How to Pack:
Step 1.  Check the weather and the cultural expectations – this one is obvious, you want to know what type of clothes you'll need. Obviously you need more clothes for travel to colder destinations. Add jackets, tights, hats and boots as required. Its also useful to do a Google search and check whether your destination will be a place you can wear skimpier outfits or somewhere you should be covered up. There’s nothing worse than arriving somewhere and feeling like the unfortunate centre of attention. When in doubt, always take a few conservative pieces just in case and check out what the women are wearing when you arrive.
Step 2. Gather Your Basics - Without fail I always take the following things with me – breton style nautical top, black and white singlets/tees, khaki hooded cotton jacket, leather shorts, denim jeans, one LBD  (black bodycon number usually works well) and a white silk collared shirt. As in every day life, good basics are the foundation of a versatile travel wardrobe.
Step 3. Add key colour items – choose a colour palette for a few additional pieces. This reduces the likelihood of having mismatched outfits. Depending on what I have in my wardrobe I usually add a maxi skirt (great for travelling), long sleeved shirt, a few mini skirts and a pair of shorts in my chosen colour palette. You can of course choose a couple of colours for your palette, just try to make sure they are all compatible.
Step 4. Rationalise your shoes - Shoes are the most bulky part of your luggage and if you can restrict the number of shoes you take with you, life will be much easier. But you don’t want to feel like you lack shoes either – I usually take one pair of classic black patent heels (maybe a second pair if I am going somewhere dressy like New York or Paris), a pair of ballet flats, ankle boots, a pair of comfortable shoes like converse or plimsols and a pair of gladiator sandals. Thats conservative and still 5+ pairs of shoes... eeep!
Step 5. Complete with Accessories - I usually take a few nice statement pieces of jewelry which I can throw on in the evening to feel a little bit more dressed up, such as a pair of tassel earrings or a gold coin necklace. My Asos floppy fedora always comes on holidays with me, I also almost always take a bag with a long shoulder strap so it can be worn cross body, so I can relax when wandering around busy train stations and streets.

Other tips?
Do a layout – when packing make sure to lay everything out on your bed so that you can visualize the outfits and how they will go together. This has been the one single factor that has helped me to create better holiday wardrobes.

Cosmetics and Beauty – I don’t own much make up and my beauty inventory usually consists of bronzer or blush, a good moisturizer and cleanser and maybe some mascara if I’m feeling adventurous. I do however often take my hair straightener for city breaks (but not beach breaks), knowing that most hotels will have a hair dryer.

Other key things to take? A good book  (Man Booker prize winners usually ticks the right boxes), ear plugs and an eye mask, a notebook for writing down ideas/travel stories, a good camera, and a great attitude. Oh and finally, make sure to roll your clothes up tightly so all of the above can fit in your carry on.

Update: If you have trouble packing it may also be that your wardrobe is in disarray. Why not follow my 7 Steps for Wardrobe Rehab here to make packing (and generally getting dressed) easier?
Related Posts Plugin for WordPress, Blogger...